3 quick steps and ready to use
Included since second minor release:
Included since third minor release:
Included since 4th minor release:
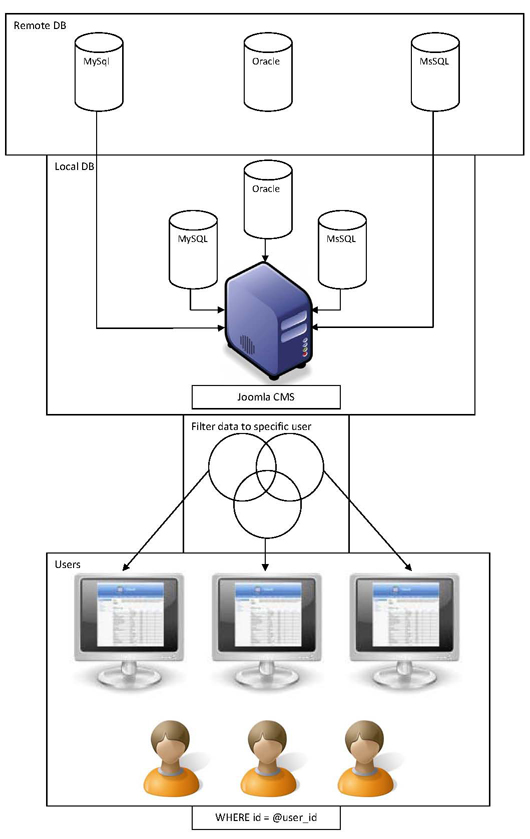
- User specific data
- New external DB handling (supported MySQL, MySQLi, Oracle, MS-SQL)
- New DB type - MS-SQL
- Measure time with 'Query took'
- Different types DB grids on the same content page
- New settings
Included since 5th minor release:
- Search engine friendly (SEO)
- Linkable content
- Second order by
- Adjustable row height and column width
- Encoding support
Included since 6th minor release (version 1.5.6):
- New layout option - Table or Card
- Displaying sql view also for external databases
- New personal file download page in Customer Area - using Table JX
Included since 7th minor release (version 1.5.7):
Included since 8th minor release (version 1.5.8):
Included since 9th minor release (version 1.5.9):
- Multilanguage support
- New settings
Included since 10th minor release (version 1.5.10):
- Bug fixes
NEW!!! Included since 11th minor release (version 1.5.11):
- Advanced filters
Tutorials
1. Installation
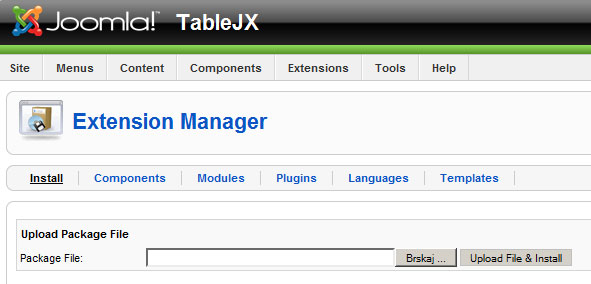
In the Administration page click Extensions and then under Install hit button Browse and select com_grid.zip (this is the file you have already downloaded via Download button). After the successful installation go to the next step.
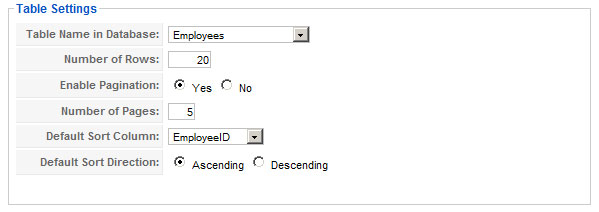
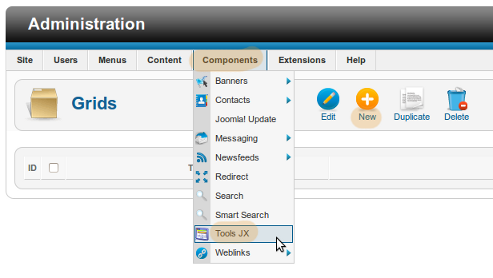
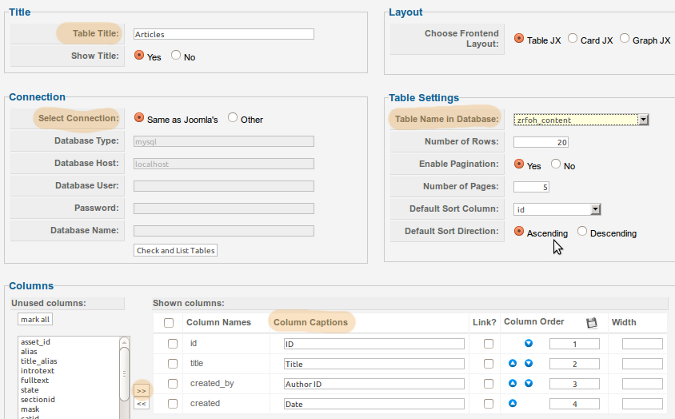
In this step we are creating one grid that will be later shown in the content page. So, go to the Components and hit the Grid. The mask is shown below.
- Table Title - the name of the grid in the content page. The name can be whatever you want or just the name of the table in the database.
- Select connection - you have two options, Same as Joomla's or Other. If you select the first option, you will be using connection for the database that Joomla is using. Tipiclly that is MySql database. In the second option, Other, you specify connection with your own database.
- Database Type - You can use mysql, mysqli, oracle, mssql
- Database Host - enter localhost for local network or IP address or domain name for remote database
- Database User - enter the database user that can read from the database
- Password - this is the password that coresponds to already entered user
- Database Name - the name of the database, e.g. Northwind
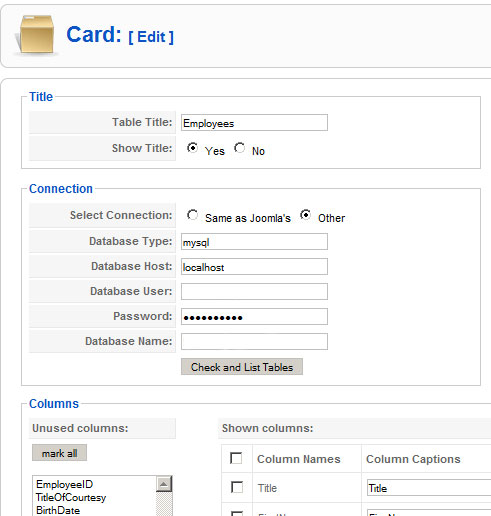
Hit the button Check and List Tables. You can se if the connection with the database is established. If not, you have to check above parameters again.
- Table name in Database - in the drop-down box select the table
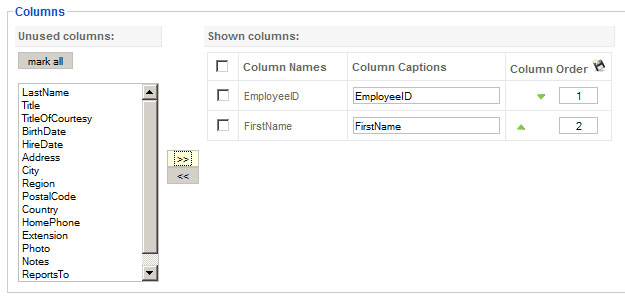
- Columns - in this section are the columns of the selected table automatically displayed. Select the columns you want to display. If you enter new name of the column in the Column Caption fields, the column will be renamed, otherwise will be used default name from the table in the database.

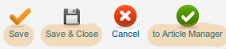
Don't forget to click Save or Apply.
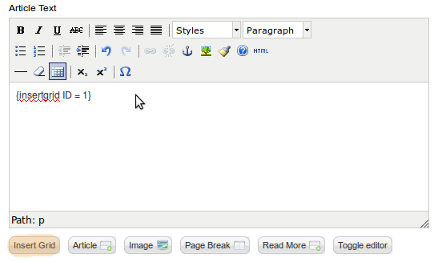
3. Using grid in the content page
Now when we already have configured the grid, we can put it in our content page. We can do that with the button Insert Grid, which is highlited in the picture below. If we know the grid's ID, we can just write text in curly braces with that ID.
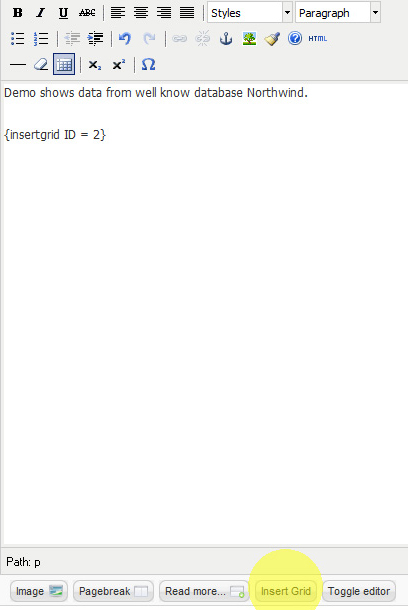
Now we Save or Apply our content page and see the result on the page. Simple, isn't it?
Since second release:
Since third release:

Since 4th release:
User specific data - create filter to show user's specific data to currently logged in user
You can create content page with access level Registered. Create grid - in advanced section under WHERE id=@user_id. Id is the name of the column where joomla ID's are stored.

New external DB handling (supported MySQL, MySQLi, Oracle, MS-SQL)
You can now test connection and list tables (if everything goes ok) with Check and List Tables button. It is possible to fetch data from localhost or even remotely if your database exists on different location (e.g. other part of the world).
Some specifics for some DB' types:
- for MySQL
* everything works by default
Other DBs:
Get correct libraries and copy/paste them to apache/bin folder.
Be sure that you have proper php.ini (uncomment right extensions in php.ini file).
- for MS-SQL
* Database host: is the same as Server name in Microsoft SQL Server Management Studio (if you are connecting remotely write also port number)
e.g. Database host: yourdomain.com:1433
PHP manuals for MS-SQL (linux or windows)
- for Oracle
* if standard port is used (e.g. 1521) do not need to specify the port in Database host
e.g. Database host: yourdomain.com
else (non-standard port 1522)
e.g. Database host: yourdomain.com:1522
PHP manuals for Oracle (linux or windows)
Measure time with 'Query took' (enable/disable in admin)
Different types DB grids on the same content page
Since 5th release:
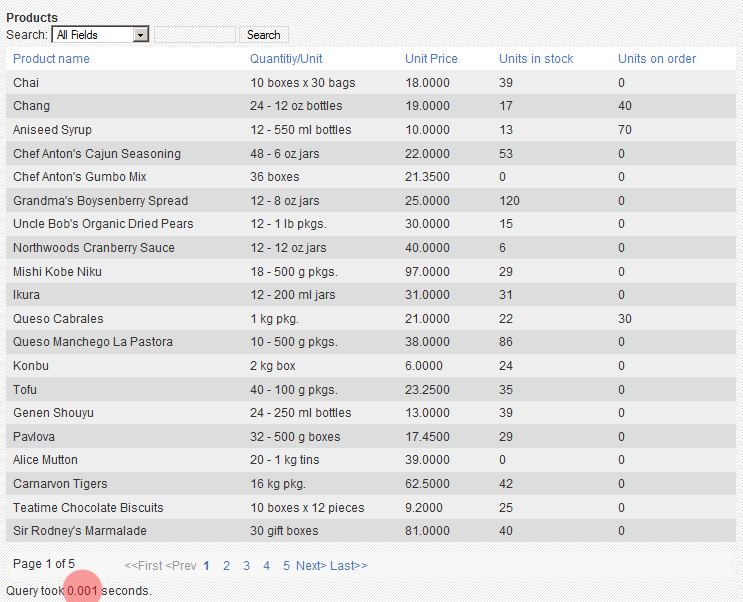
Search engine friendly (SEO)
On TableJX was made a great effort to be as much search engine friendly as possible. This functionality enables that records in a grid are indexed by search engines, like Google, Yahoo, Bing, etc... If you have some, let's say, products in a grid, search engine finds them easily. This could be a great benefit for your business. If you put a grid inside of the registered area, then it will be safe, if you don't want to show to the rest of the world what is inside of your grid.
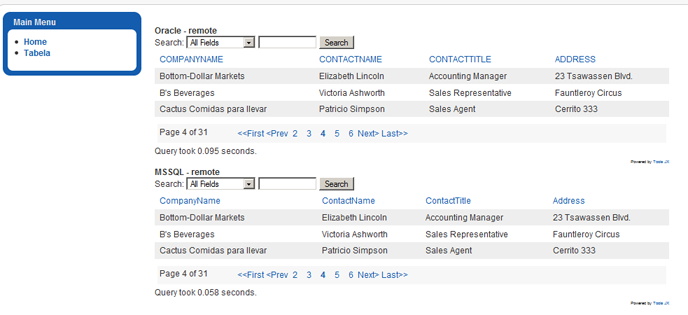
Linkable content enables that you just click on a value in a grid and this action opens specific URL or specific joomla Article, Category or even Section. You can very easily show content that is specific for this value in a grid. If you are more creative, you can put even another grid in an article and show some specifics. Example: You have grid full with products. If you click on a specific product, this can open another article with pics of this product or even detailed specifications in the another TableJX grid. Further, you can create again links on specifications grid and show another article with even more detailed information. At the end you can have the whole chain of linkable grids.

If you are not familiar with SQL or you just don't have time to create an sql view an show it in TableJX grid, you can in admin section with few clicks create a grid with data as you wish. See documentation above. In the 5th minor release, you can find new functionality, so called Second order by. In the demo, in Customers grid, you can see first order by on Customers Titel column and second order by on the Surname column.

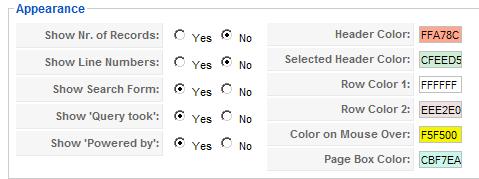
Adjustable row height and column width
Well, really nothing specific to say here. If your data doesn't fit in your page you can adjust these two settings.

Doesn't matter if your language has β, Č, Ð, Ë, Õ or other letters or specific signs, TableJX will show them without any problem. If you have some specific rule to order these letters or signs, we can provide instructions how to set up databases correctly.
New layout option - Table or Card
Since version 1.5 you can find in admin area also layout option Table or Card. When you purchase and install Table JX only Table can be checked If you purchase and install Card View JX, you can choose then between Table or Card display in front-end.

Displaying sql view also for external databases
Since version 1.5 is also available to display besides SQL Tables also SQL views for other (external) databases. This brings you the ability to display any SQL query (table joins, filters, calculations, groupings, ...) or in other words, whatever you can do with SQL.
New personal file download page in Customer Area - using Table JX
We have changed file download page to more user friendlier as one before. The download page is using Table JX and it presents user specific data or files that can be downloaded or purchased.
- typing mistakes
- loading image path
- vulnerabilities fixes
You can find Customer Area here.

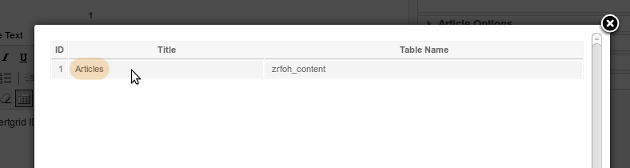
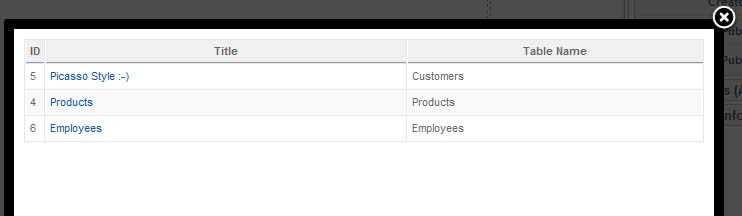
 gets inserted into an article. If you check now this article on the frontend you will see that the code was replaced with an actual grid. If you are for some reason unable to use the "Insert Grid" button, you can write this code by yourself. Just replace the number (1) with the id of the grid that you want to be inserted into the article.