Common with Table JX:
- Table Settings
- Column Order
- Color Picker
- Advanced section
- User specific data
- New external DB handling (supported MySQL, MySQLi, Oracle, MS-SQL)
- Measure time with 'Query took'
- Different types DB grids on the same content page
- Search engine friendly (SEO)
- Linkable content
- Second order by
- Adjustable row height and column width
- Encoding support
New! Card View JX available:
- New layout option - Card
- Displaying sql view also for external databases
- New personal file download page in Customer Area
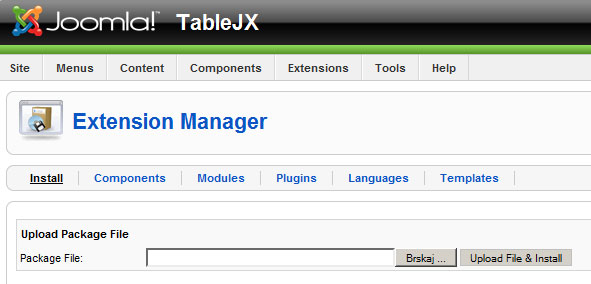
In the Administration page click Extensions and then under Install hit button Browse and select card_jx_v1.5.zip (this is the file you have already downloaded via Download button). After the successful installation go to the next step.
In this step we are creating one grid that will be later shown in the content page. So, go to the Components and hit the Grid. The mask is shown below.
- Table Title - the name of the grid in the content page. The name can be whatever you want or just the name of the table in the database.
- Select connection - you have two options, Same as Joomla's or Other. If you select the first option, you will be using connection for the database that Joomla is using. Tipiclly that is MySql database. In the second option, Other, you specify connection with your own database.
- Database Type - You can use mysql, mysqli, oracle, mssql
- Database Host - enter localhost for local network or IP address or domain name for remote database
- Database User - enter the database user that can read from the database
- Password - this is the password that coresponds to already entered user
- Database Name - the name of the database, e.g. Northwind
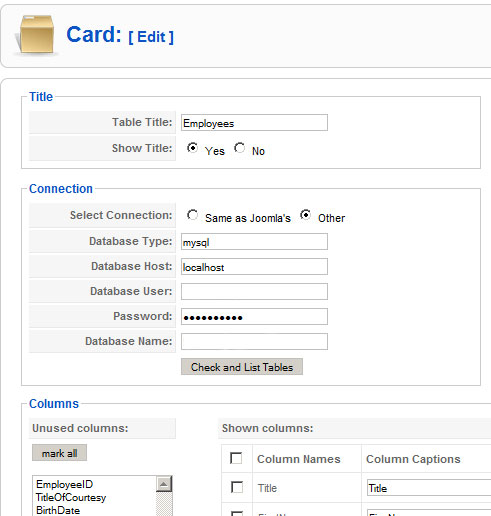
Hit the button Check and List Tables. You can se if the connection with the database is established. If not, you have to check above parameters again.
- Table name in Database - in the drop-down box select the table
- Columns - in this section are the columns of the selected table automatically displayed. Select the columns you want to display. If you enter new name of the column in the Column Caption fields, the column will be renamed, otherwise will be used default name from the table in the database.

Don't forget to click Save or Apply.
3. Using grid in the content page
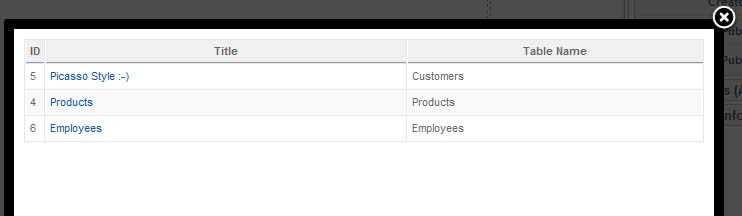
Now when we already have configured the grid, we can put it in our content page. We can do that with the button Insert Grid, which is highlited in the picture below. If we know the grid's ID, we can just write text in curly braces with that ID.
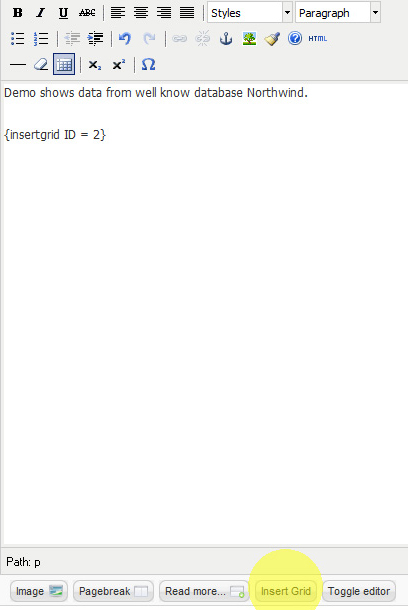
Now we Save or Apply our content page and see the result on the page. Simple, isn't it?
Here you can find for now 2 option: Table and Card. If you are also Table JX customer, you will have also Table enabled, else only Card.
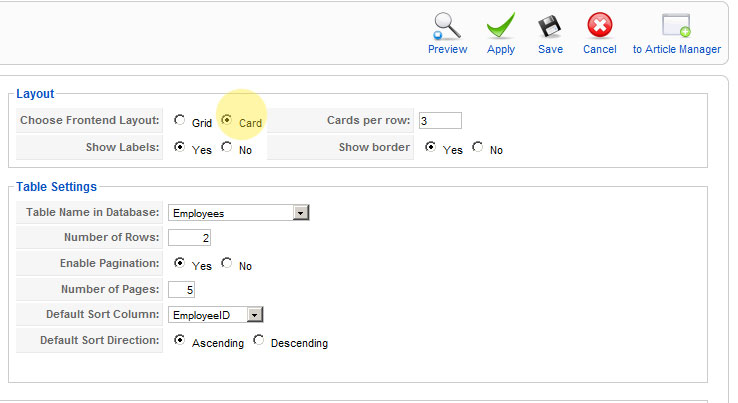
As you can see, you have here 3 options:
Cards per row - this is the number of cards horizontaly (the number of cards verticaly can be set in Number of Rows)
Show labels - this is referring to column names, if you would like to dispay them or not
Show border - this is more or less artistic feature if you would like to display border of each card
Displaying sql view also for external databases
Since version 1.5 is also available to display besides SQL Tables also SQL views for other (external) databases. This brings you the ability to display any SQL query (table joins, filters, calculations, groupings, ...) or in other words, whatever you can do with SQL.
New personal file download page in Customer Area
We have changed file download page to more user friendlier as one before. The download page is using our tools and it presents user specific data or files that can be downloaded or purchased.

You can find Customer Area here.