1
{loadmodule mod_custom,SJXLocations-product}
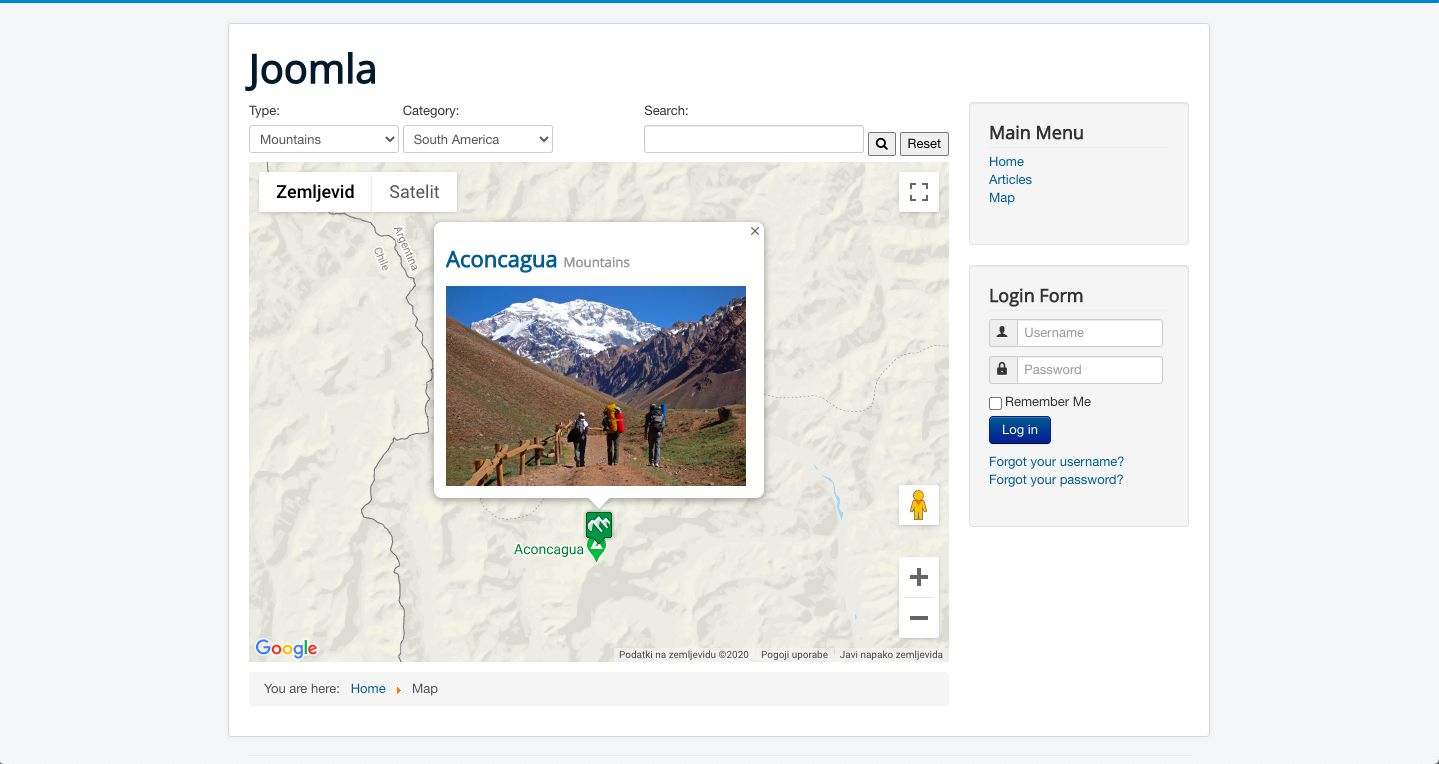
With SJX Locations you are able to showcase your galleries within an article. This can be done by just a few clicks. Check also the demo page, to see how the results look like.
A few steps to display your locations.
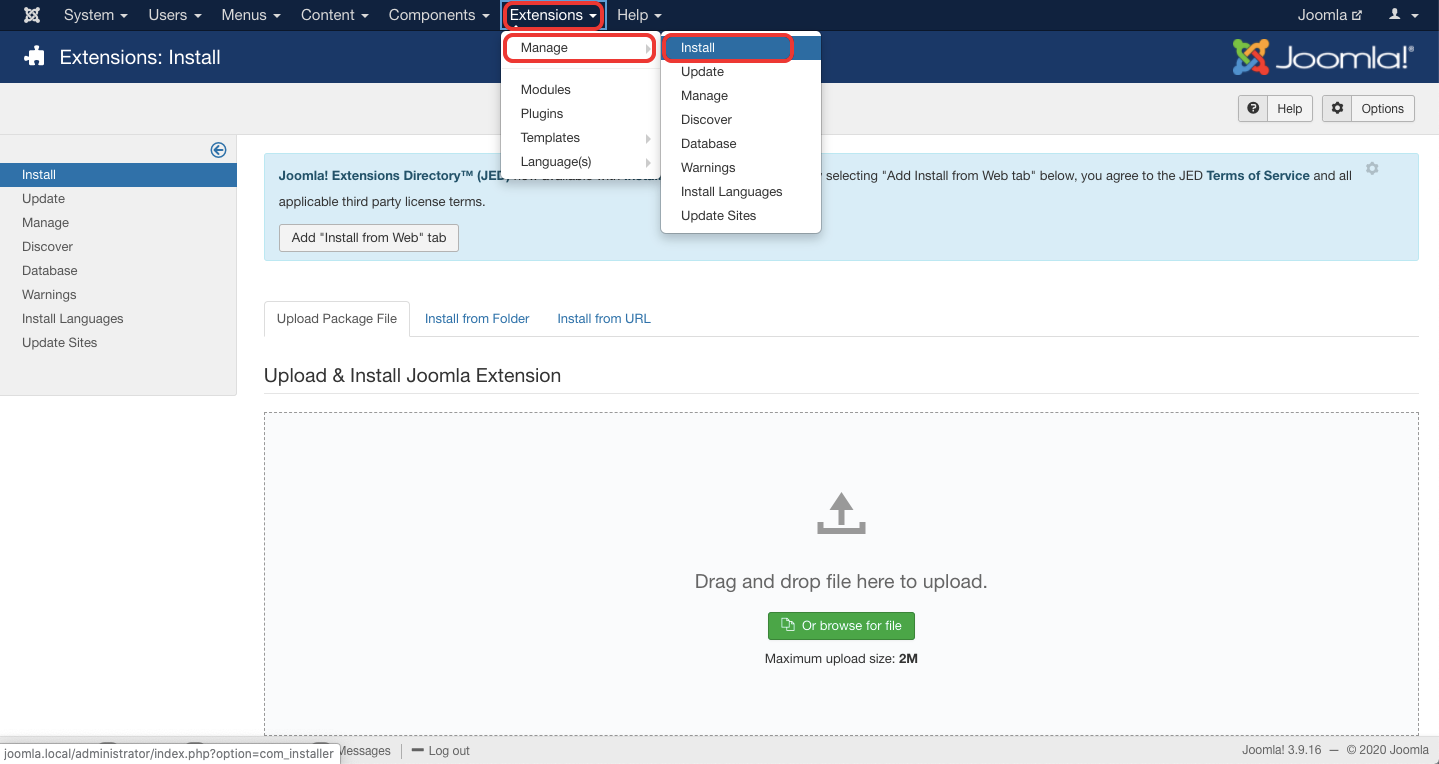
1. Installation
Installation is not different from any other Joomla extension. Go to Extension Manager (Extensions > Manage > Install). Find and select the installation package from your computer by dragging and dropping a file or clicking the "Browse for file" button to install the extension on your site. During the installation, the main component and will be installed and enabled.
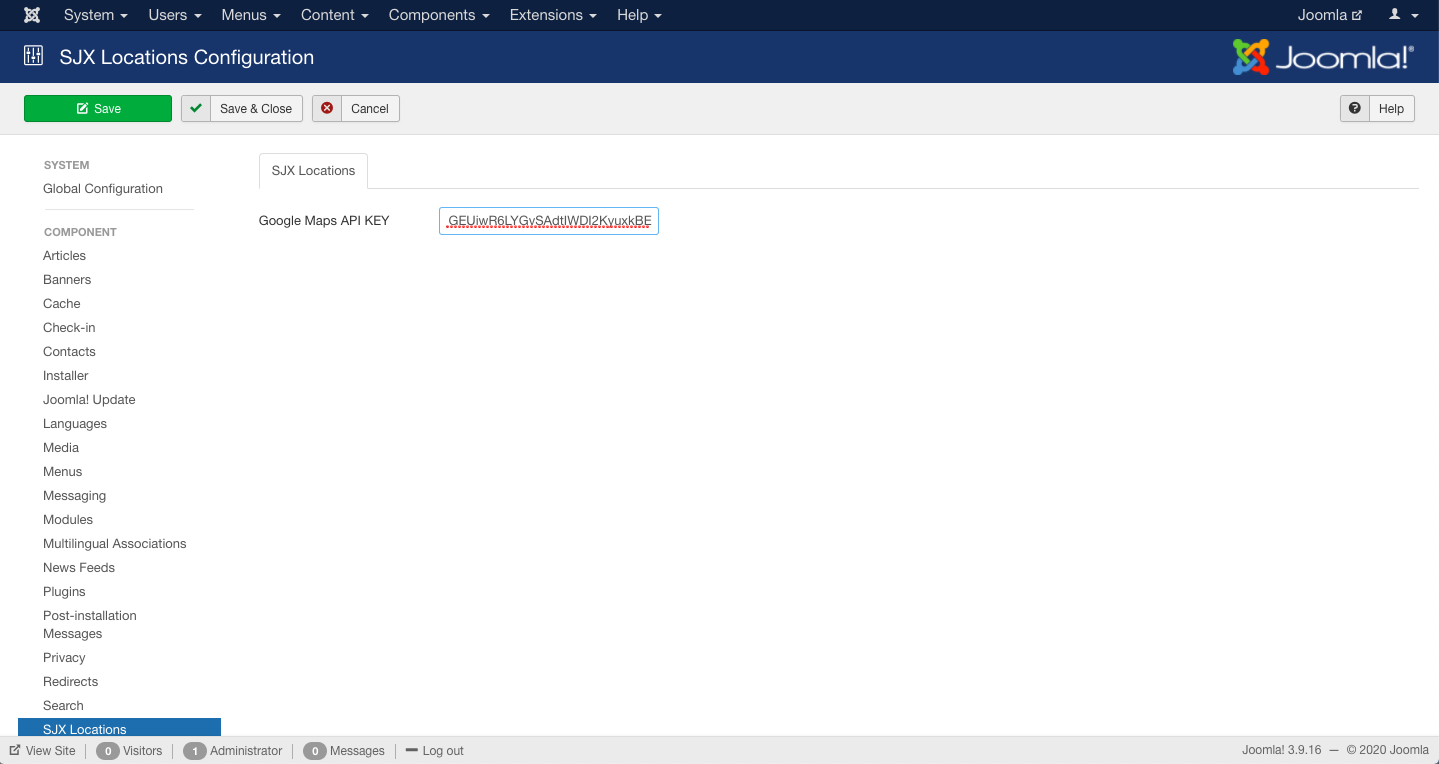
2. Setting up Google Maps
To use Google Maps you must first obtain an API key.
After getting it navigate to SJX Locations and click on the "Options" button, which you can find in the top right corner.
A form will appear where you can enter the key.
3. Creating attributes
In the beginning, you need to create a set of attributes for your locations. In this example, I will use mountains as locations and will firstly create the appropriate attributes.
Navigate to Components > SJX Locations > Contents, where you will find an empty list of attributes. Click the "New" button to get started creating your own set of attributes.
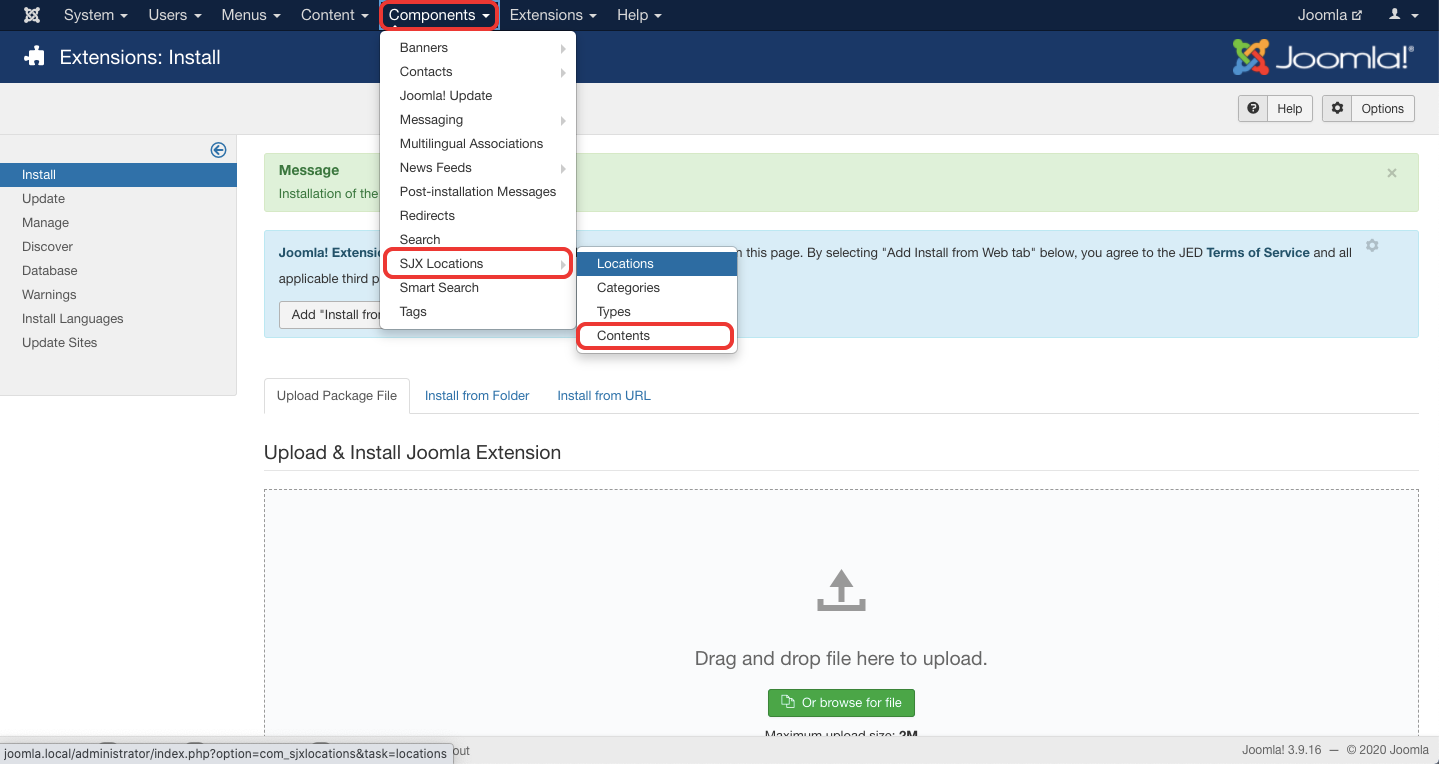
A form appears where you need to enter the attribute name and select a type. You can choose from the table and description types.
In my example, I will create 3 attributes, difficulty(table), height(table), and description(description).
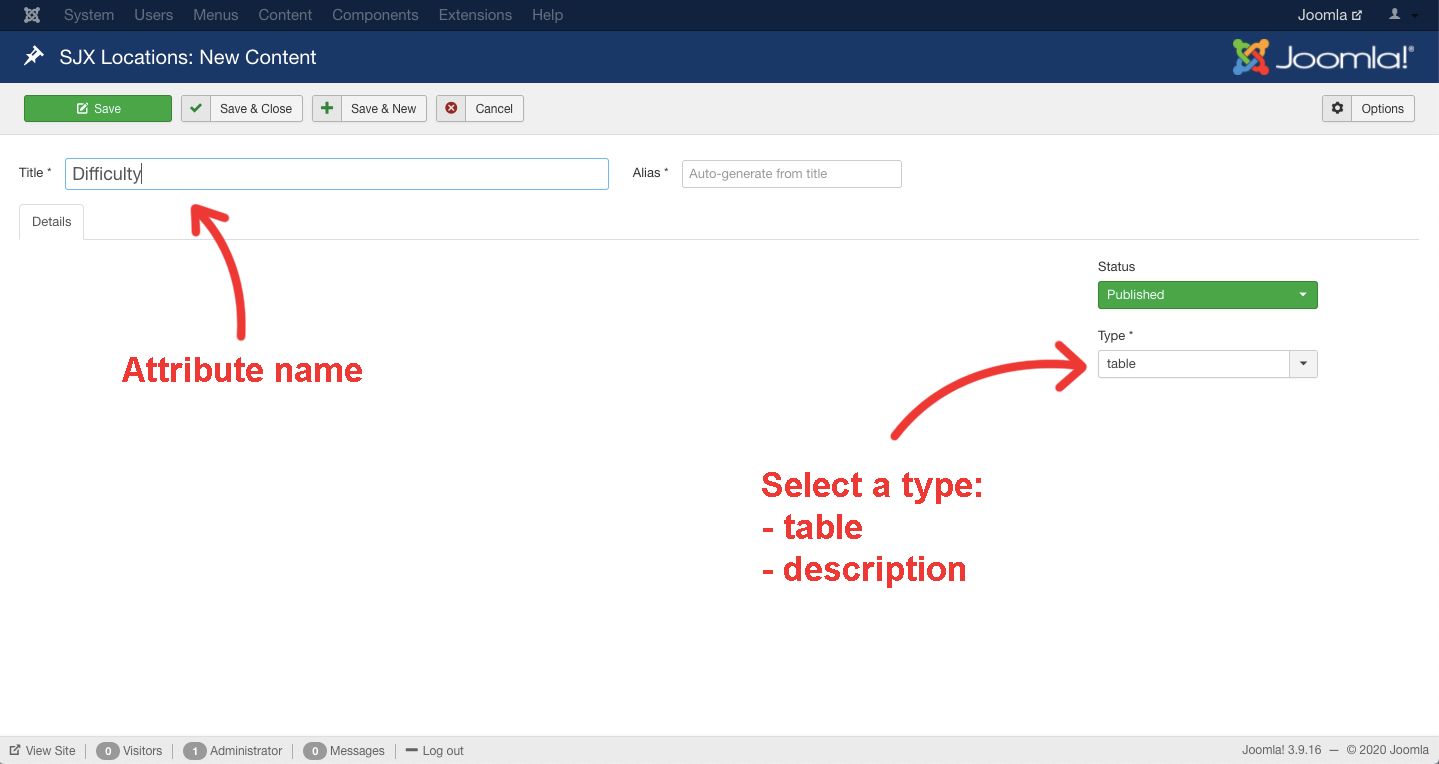
4. Creating types
Next, you'll need to create at least one type. In my example, I will create a type called "Mountains". Additionally, I could create more types such as lakes, huts, etc.
To get started navigate to SJX Locations > Types and click on the "New" button.
A form will appear where you need to enter the type name and select a marker and an icon. A marker will appear on the map and the icon will appear on the details view. You can pick among 700 predefined markers.
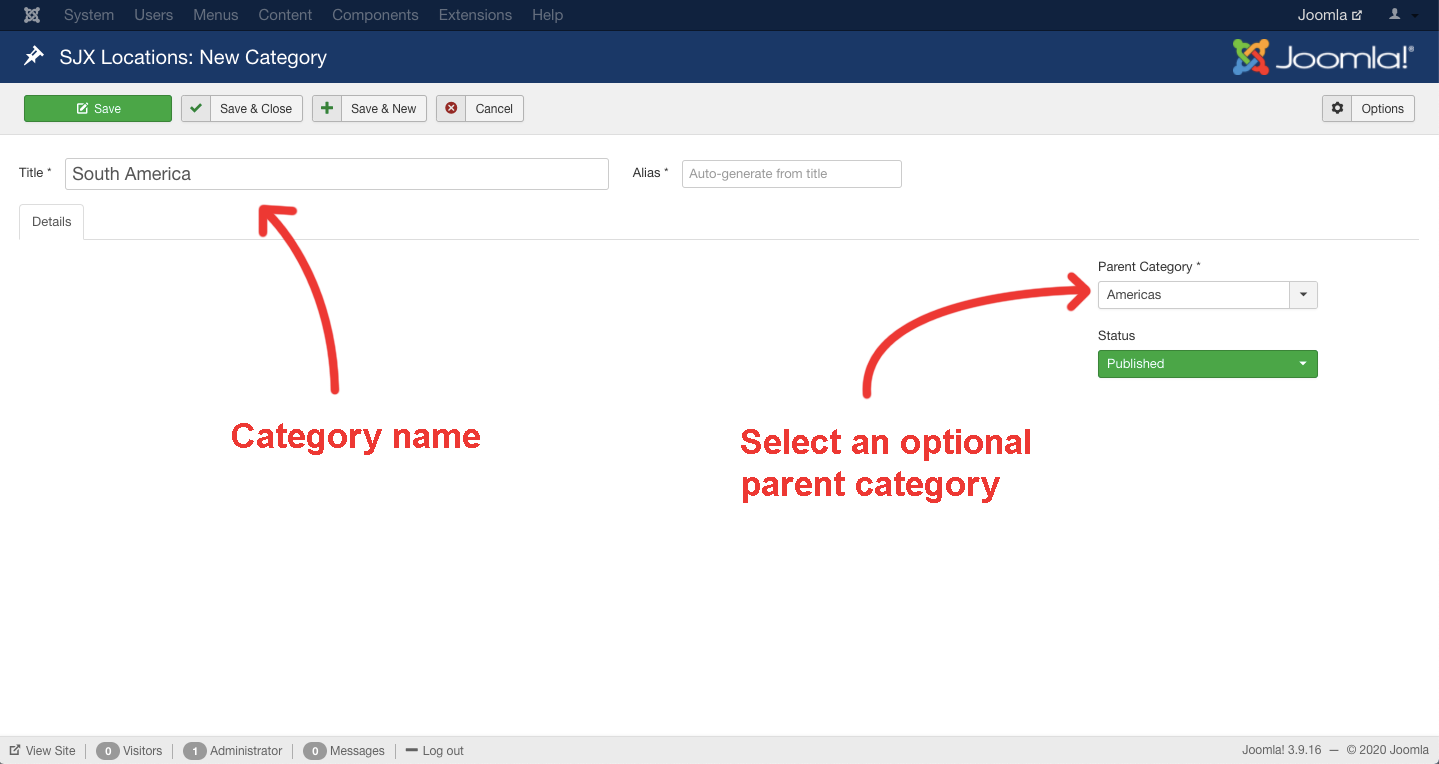
5. Creating categories
Next, you'll need to create some categories. In my example, I will categorize the mountains by geographical location. I will create an Americas and Europe category and South America as a subcategory of the Americas.
To get started navigate to SJX Locations > Categories and click on the "New" button.
A form will appear where you need to enter the category name and optionally select a parent category.
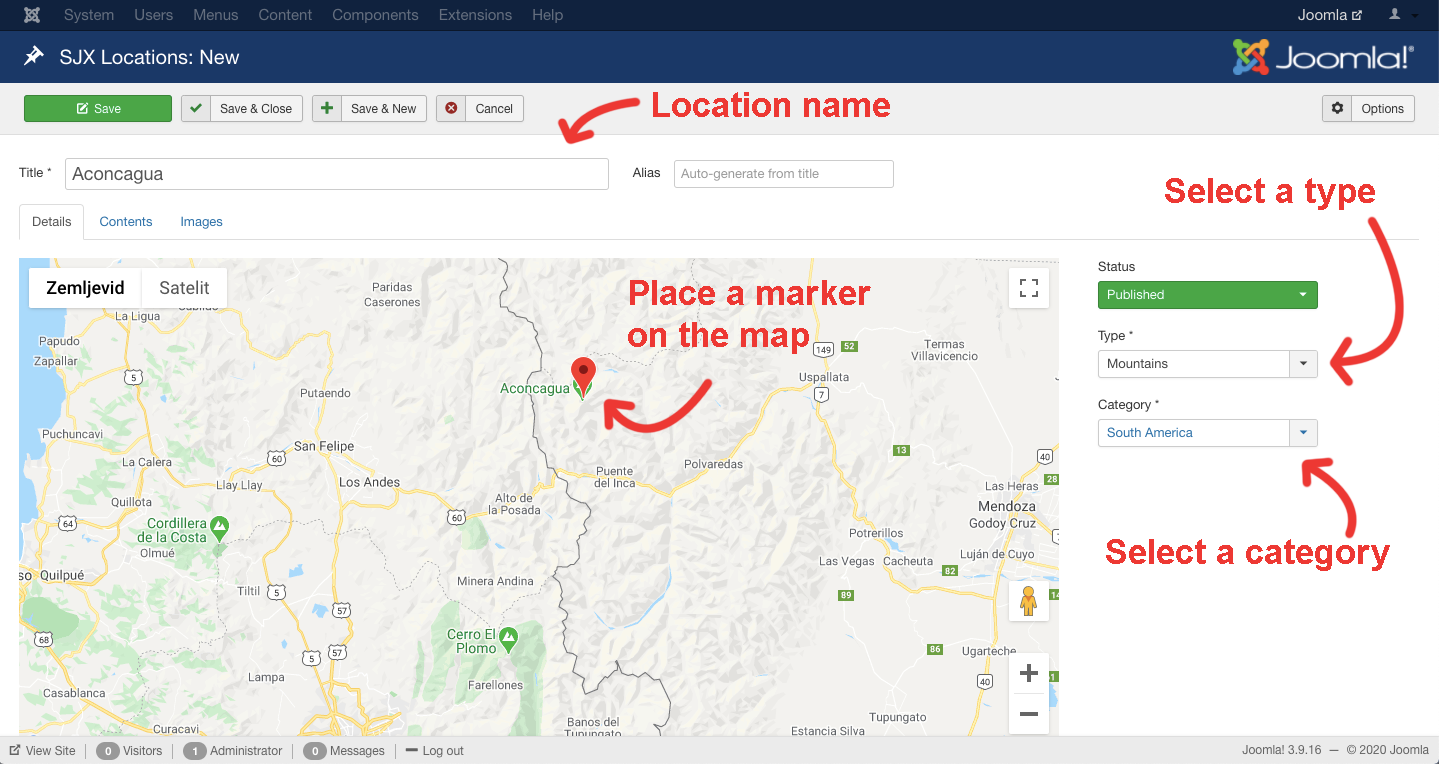
6. Creating locations
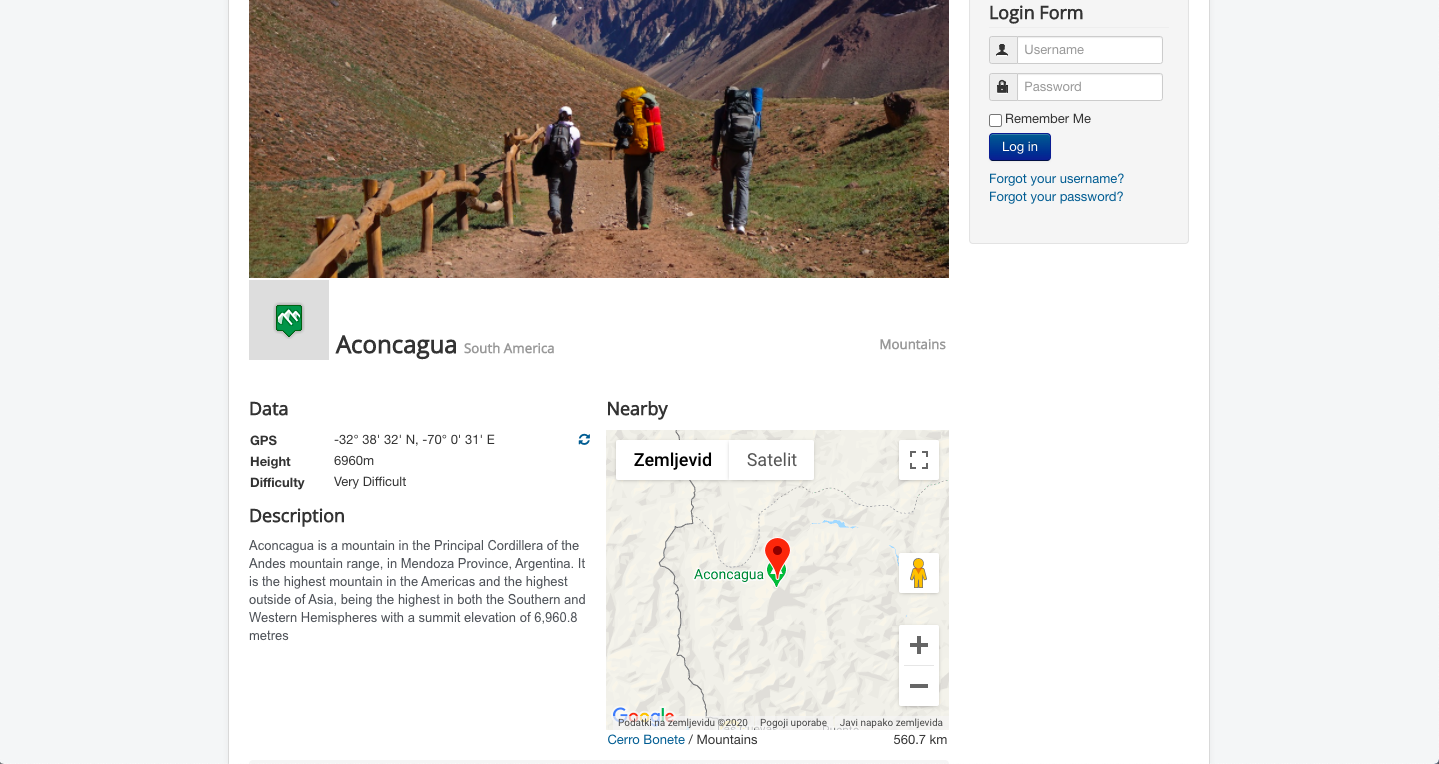
Finally, you can create your locations. In my example, I will create Cerro Bonete and Aconcagua, which are two peaks in South America.
To get started navigate to SJX Locations > Locations and click on the "New" button.
A form appears where you need to enter the location name, select a type and a category and place a marker to the desired location. Alternatively, you can also enter the coordinates below the map.
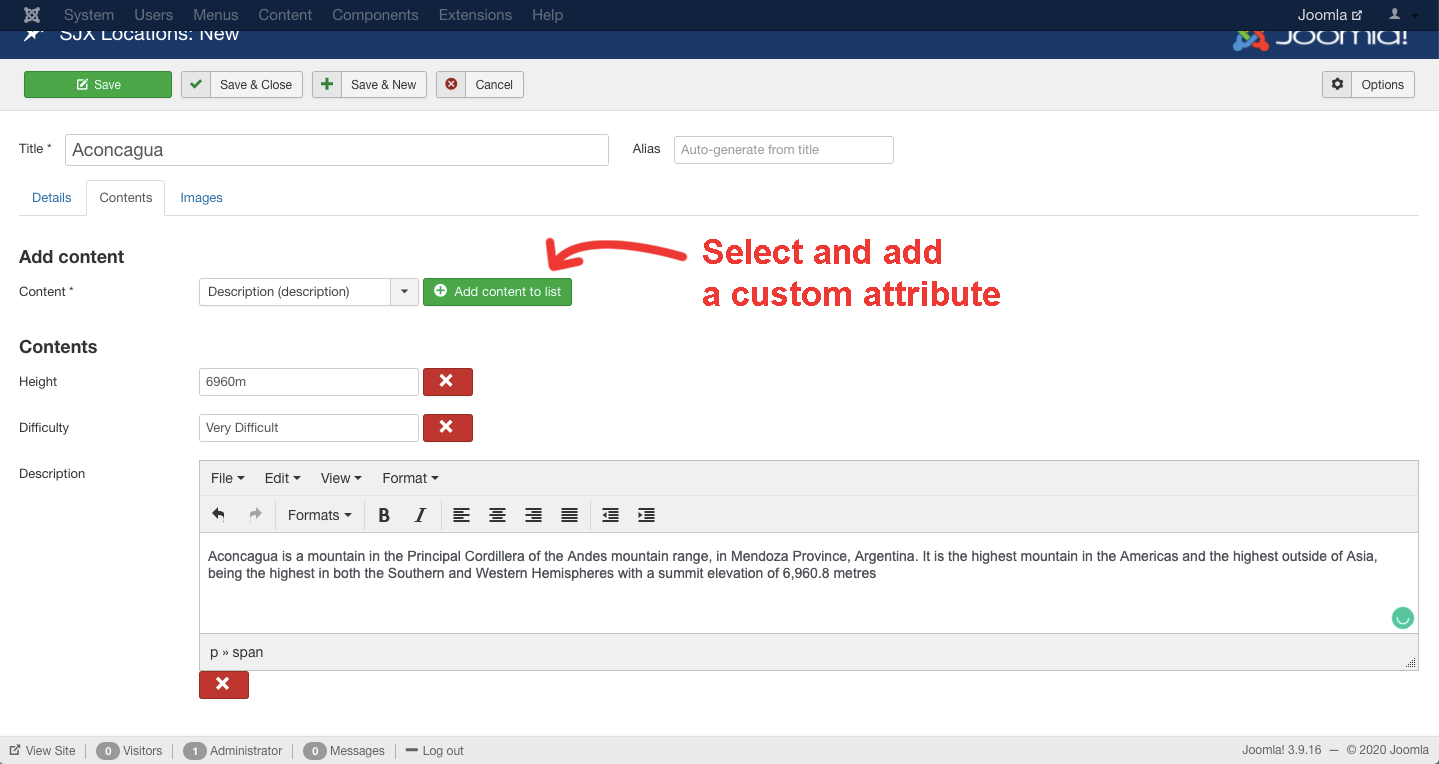
Navigate to the next tab, called "Contents", where you will set some attributes. You can pick among the attributes we defined in the first step.
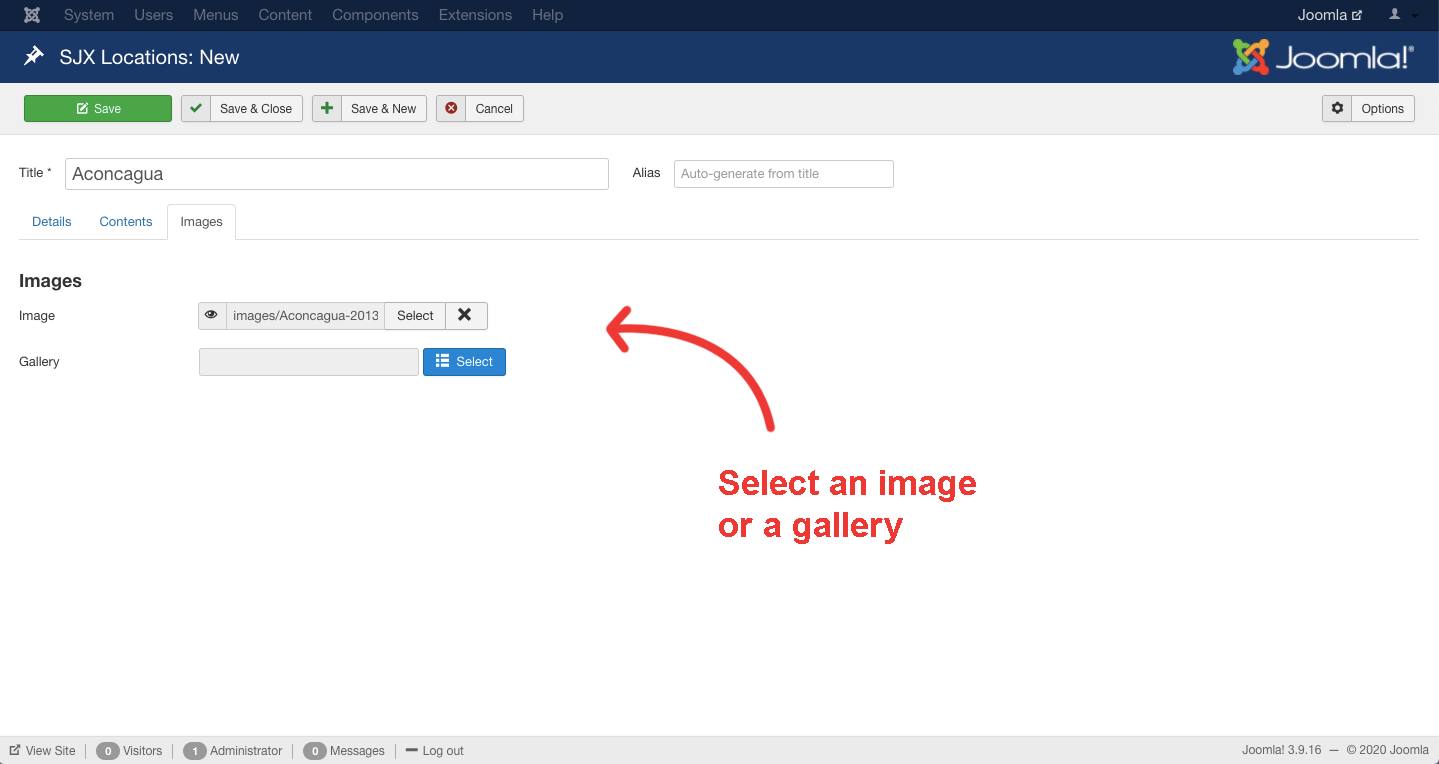
Navigate to the next tab, called "Images". Here you can select a cover image for the location. If you also have the SJX Galleries component installed you can pick among the galleries and a slider gallery will appear instead of the cover image.
Now you have successfully created your first location. Don't forget to save before moving to the next step.
7. Displaying the locations
Now, after you have created the locations, you will want to show them on the frontend. To do this you need to create new menu item.
Navigate to Menus and create a new menu if you haven't already. Navigate to the menu and create a new menu item.
Click on select a menu type a pick SJX Locations > Map.
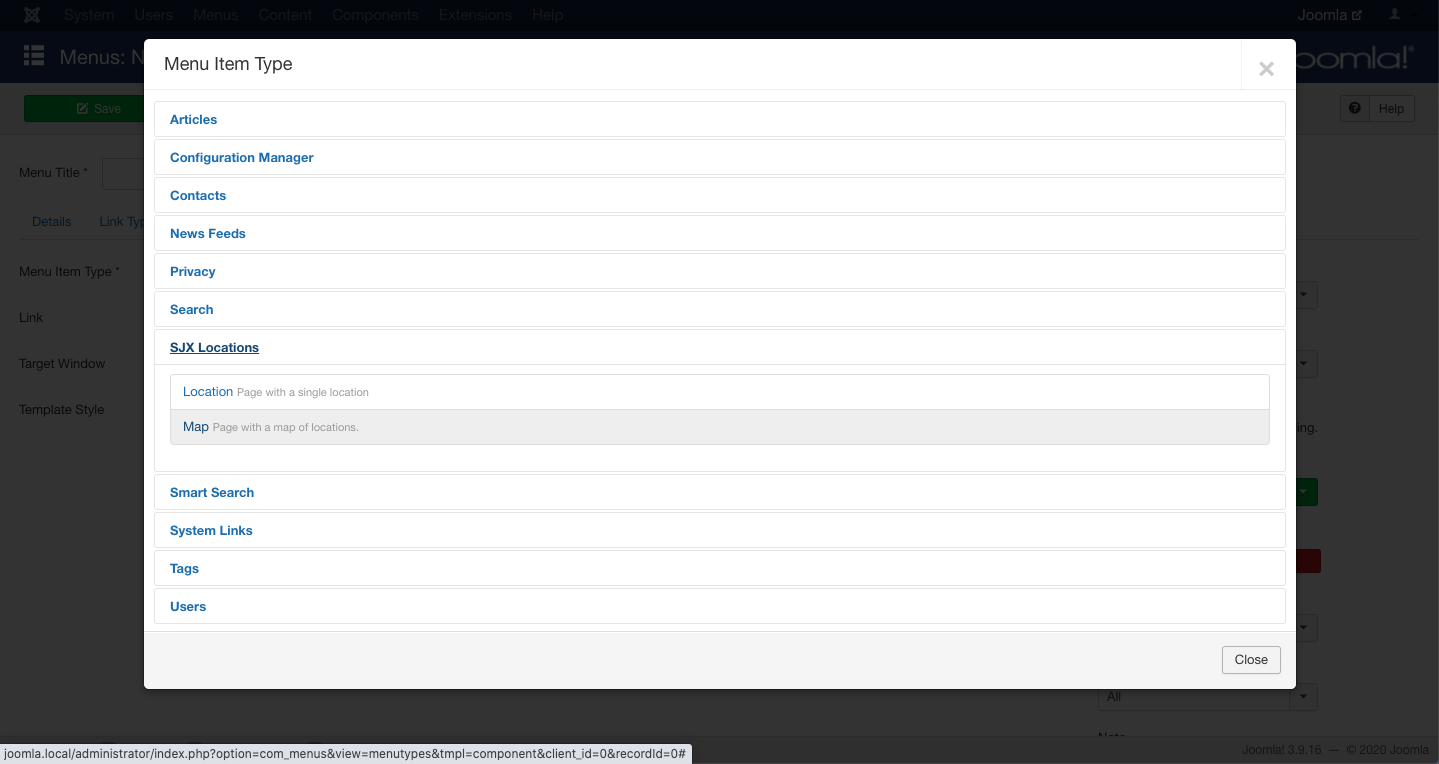
A menu configuration screen will appear where you can fine-tune your page.
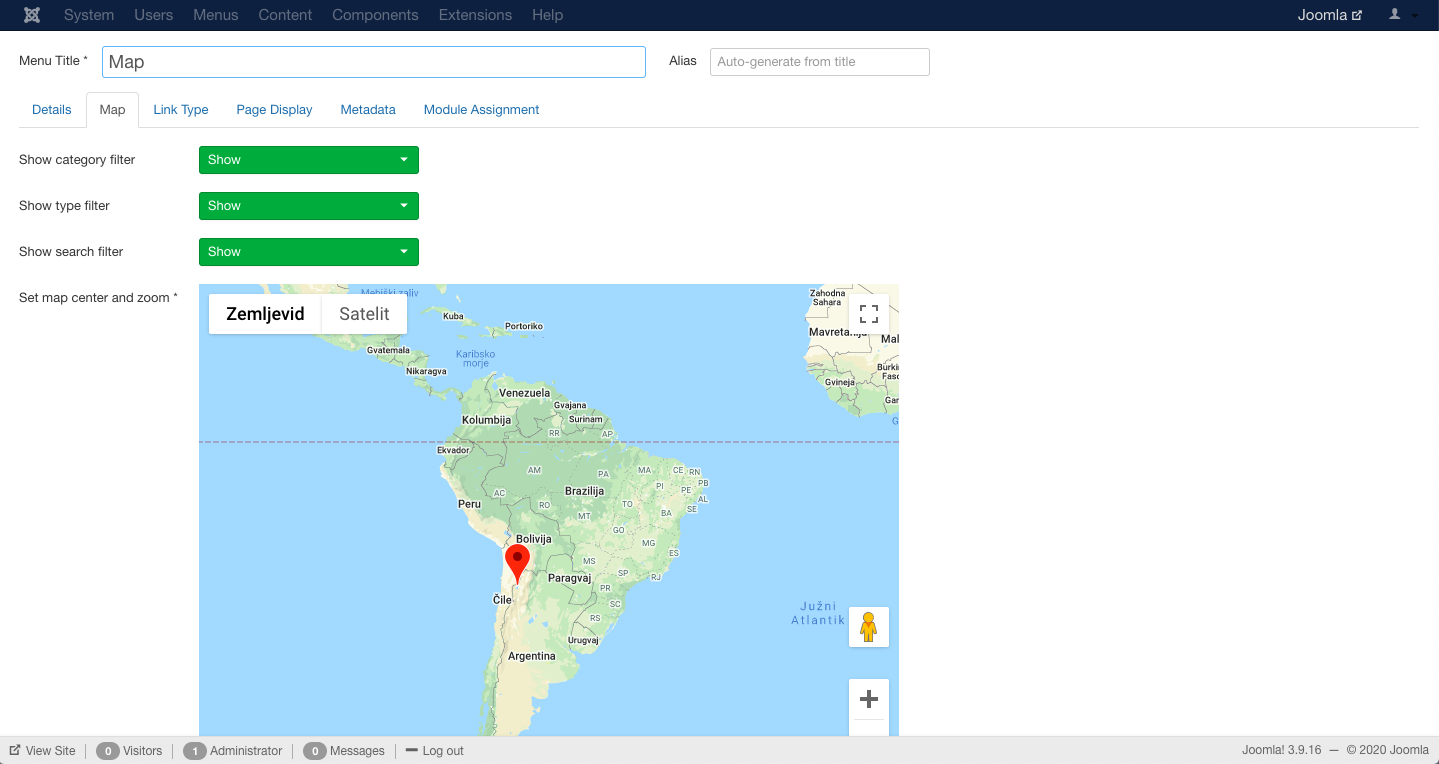
Now you are all set. You can navigate to the front end and see your map in action. You can click on individual locations to zoom in and navigate to the details view.