With Table JX a database table can be easily inserted into Joomla! article. This can be done by just a few clicks. Check also the demo page, to see how the results look like.
Three steps to display your data in an article.
1. Installation
Installation is not different from any other Joomla extension. Go to Extension Manager (Extensions > Extension Manager). Find and select the installation package from your computer by clicking the "Browse" button and click "Upload & Install" to install the extension on your site. During the installation the main component and two plugins will be installed and enabled.

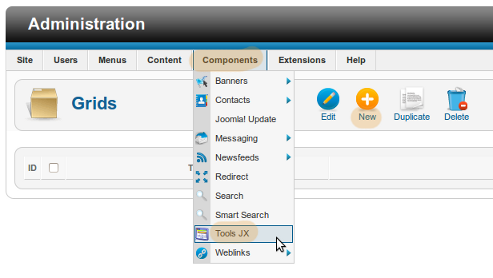
2. Creating a grid
Installed component should appear under the Components menu. After clicking on Tools JX in the menu an emtpty list should appear. To add a new grid hit the "New" button.
A form appears where you can define all kinds of settings. Since this is a quick guide, let's take a look at the basic settings only. If the data that you want to display is stored in the database where your Joomla site stores its data, you do not need to fill in the connection data. Among the Table Settings a dropdown list appears where you are able to pick a table from your database.
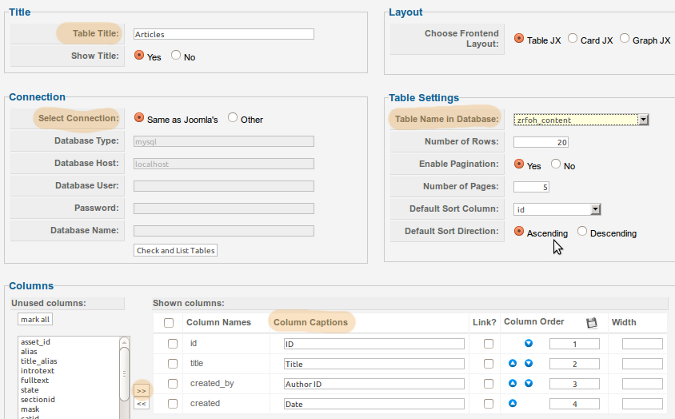
After selecting the table a list of columns from this table appears below. Select the columns that you want to display on your page and use the ">>" button. The columns move from the left to the right where you are able to set a display names for them and do some additional adjustments. If you change your mind and you want to remove one or more columns, you can select them on the right list by using checkboxes and then use the "<<" button to move them back to the Unused Columns.
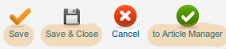
Do not forget to save your settings by clicking on "Save" or "Save & Close" button. The button "To Article Manager" also stores your settings and redirects you to the Article manager.
3. Using the grid in an article
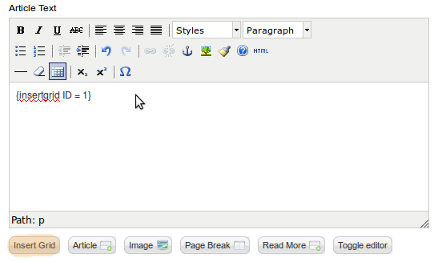
Navigate to the Article Manager (Content > Article Manager) and crate new article or open an article where you want to display the grid. Below the text editor you wil find a button "Insert Grid". Place the cursor where you want your grid to be inserted, and press Insert Grid button.
A popup window apears and you are able to select the grid that you want to insert into the current article.
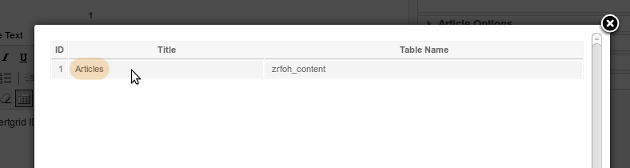
A code  gets inserted into an article. If you check now this article on the frontend you will see that the code was replaced with an actual grid. If you are for some reason unable to use the "Insert Grid" button, you can write this code by yourself. Just replace the number (1) with the id of the grid that you want to be inserted into the article.